Scheduling Alchemex Reports

This process is made up of 3 easy steps:
1. Decide where you’re going to save your report.
2. Create the Scheduler Command.
3. Set up the Windows Scheduler Task.
It’s important to remember that the workstation where you create the scheduled task, must be turned ON at the scheduled time.
Also, when using the Task Scheduler your user name must be a valid account on the domain or your local machine, with sufficient privileges to run the reports. You must also have sufficient permissions to access all the necessary resources to run the reports.
Decide where you’re going to save your report
- In the Report Manager window select the report you’re going to distribute.
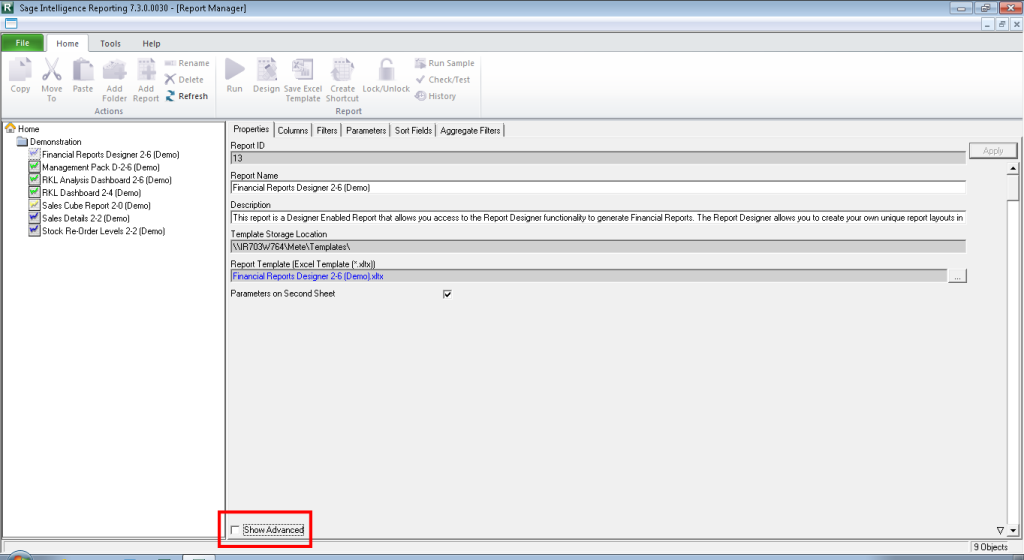
- Then, in the Properties window, tick the Show Advanced box found at the bottom of the window.
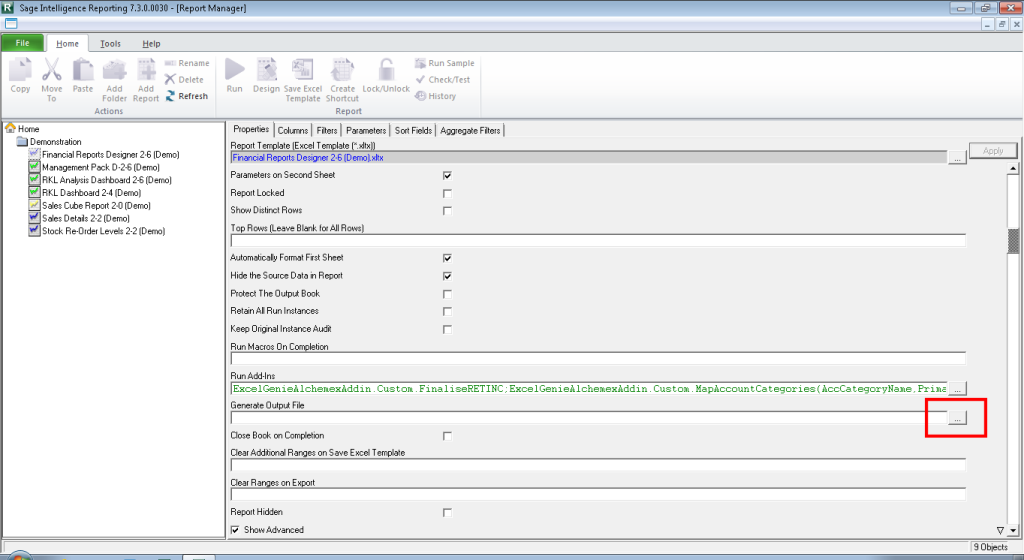
- Click the Generate Output File ellipsis button and browse to the location you want the report to be saved to when runs out.
Create the Scheduler Command
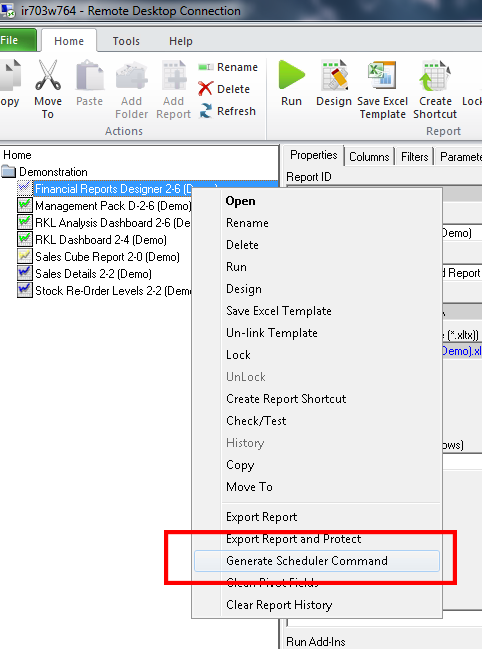
1. From the Object window, right-click on your report, then select Generate Scheduler Command.
2. If the report expects parameters you will be prompted to enter them before continuing.
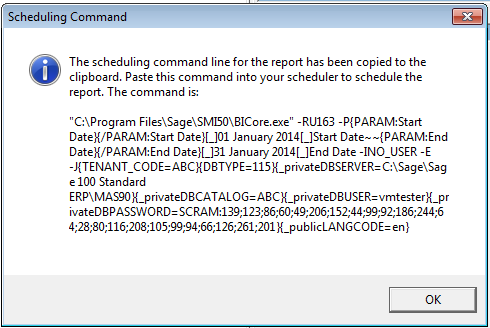
When you’re done, a message box displays and you’ll see that it shows the syntax for running the report. Don’t worry about trying to copy the syntax from this message, because it has been simultaneously placed in the Windows clipboard, so that you can paste it into the Scheduler Task Command field.
Set up the Windows Scheduler Task
1. Next, open the Windows Task Scheduler.
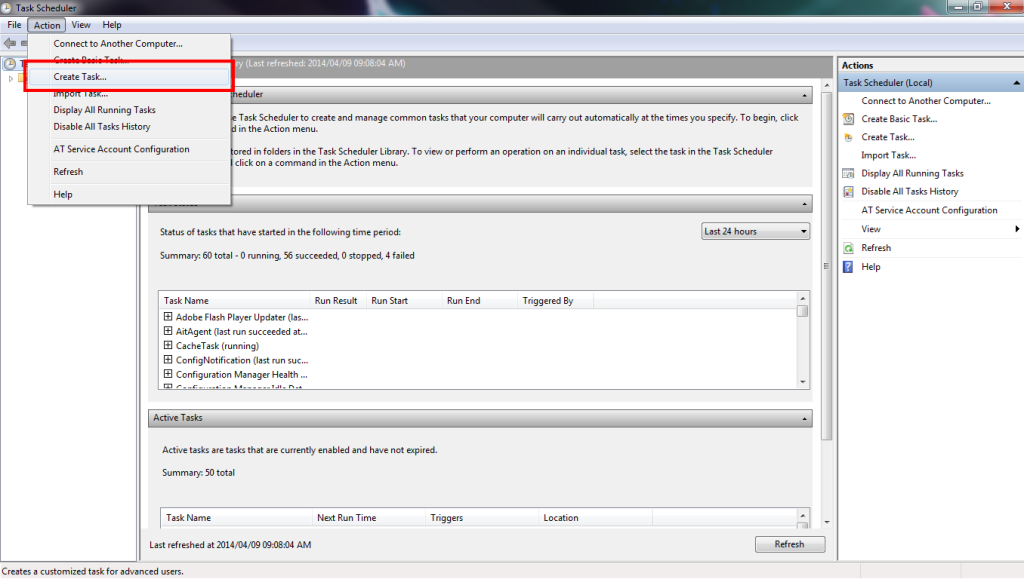
2. From the Action drop down menu, select Create Task.
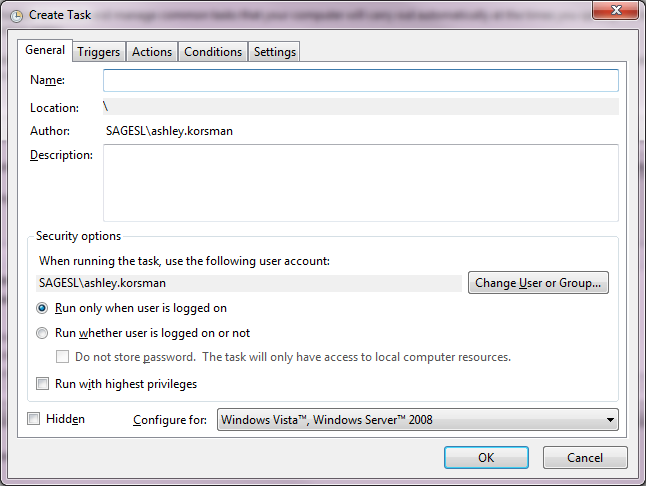
The Create Task window displays.
3. In the Name field, give your task a meaningful name. For example, Current Period Income Statement.
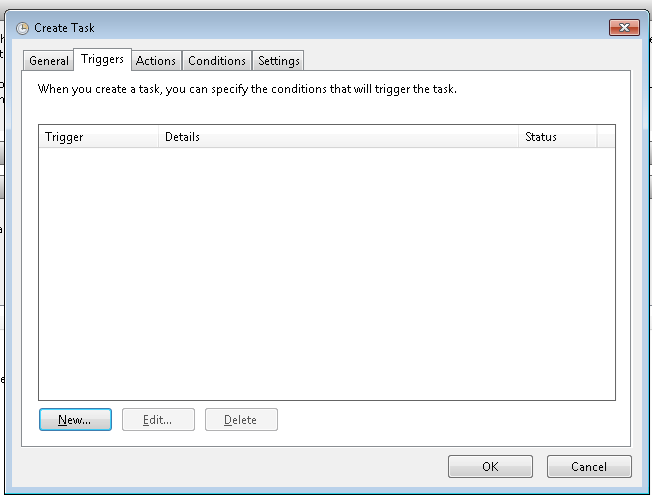
4. Then click on the Triggers tab and select New.
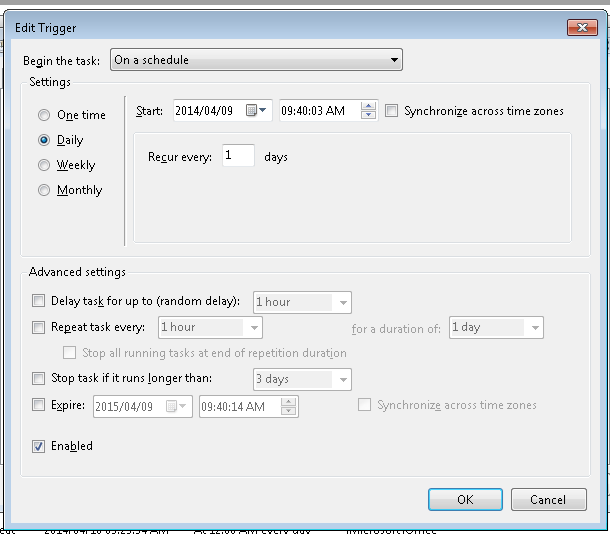
5. You can schedule your report run on a specific day, at a specific time and you can also set it to stop running on a specific day. Go through the options and find the ones that would best suit your needs.
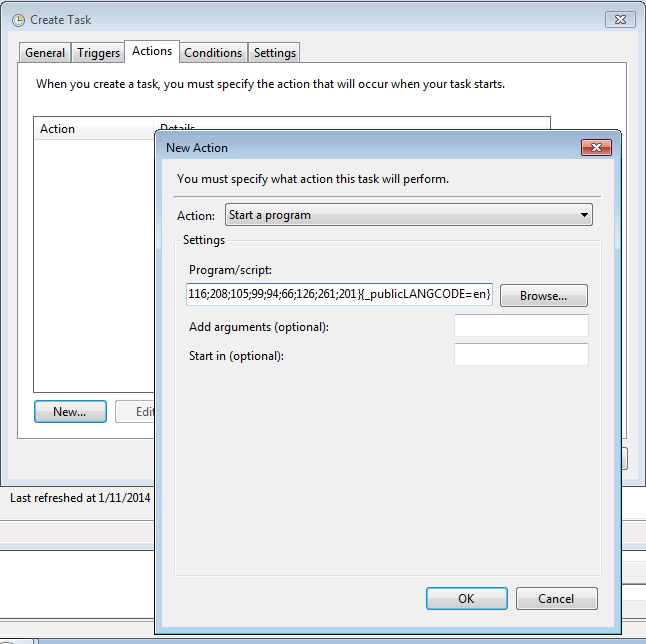
6. Now click on the Actions tab and select New
7. In the Program/script field, paste the command from your clipboard and then select OK.
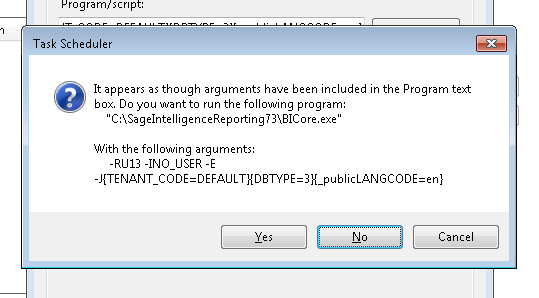
8. Click Yes to confirm and continue.
9. Now click on the Settings tab and set up your Task Schedule options.
10. Then click OK.
11. The report you chose to run via the schedule will now appear as an Active Task in Task Scheduler.
Related Articles
Error Scheduling Reports for Intelligence Reporting
Problem There is an error scheduling reports to execute using the Windows Task Scheduler Symptoms: The Report is scheduled but the BICore.exe process doesn't launch The report is scheduled but the BICore.exe launches but doesn't consume any memory ...ABM Alchemex Enabling Dongle Endless Loop
Issue - there is an endless loop trying to serialise ABM Alchemex. Resolution Please complete the serialisation process on the workstation that hosts the ABM Accounts folder. The serialisation process is attempting to add entries to the Alchemex.svd ...Understanding and Linking to the Alchemex Metadata Folder
What is the Metadata Folder? All templates, licensing information and connection information is stored in the Alchemex Metadata folder. In this folder, there should be at least an alchemex.svd file (our product database), and then a Templates folder ...Excluding companies from Consolidated Reports
Issue You would like to exclude any number of companies from the consolidation reports in Velixo for MYOB Advanced. Resolution All the financial functions include a Branch argument to filter by branch or company. If you leave it blank, it includes ...Data Source name not found and no default driver specified. SQLState=IM002
Error "Data Source name not found and no default driver specified. SQLState=IM002" when trying to run any reports Resolution Go to the Connector Find the connection the report with the error is running off Ensure the report is on the correct ...
